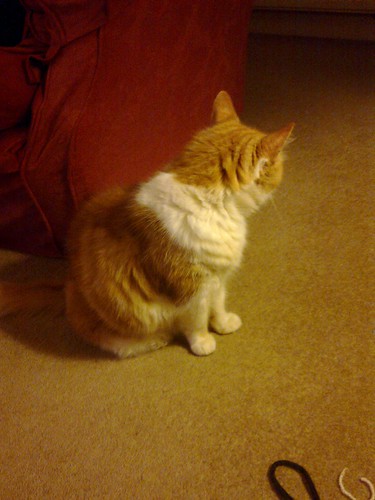
For saying I'd meet you here and then standing you up! Life has all of a sudden become very busy; I've got a very sick cat on my hands (not looking good...), tax to sort, commissions to knit,
Creative Nottingham blogs to write, and of course you lovely customers to serve (we're a bit busier now the hot, hot, hot weather has dissipated and the bank holidays of finally over). So, they're my excuses, unforgiveable I'm sure but let's just get on with it now. :)
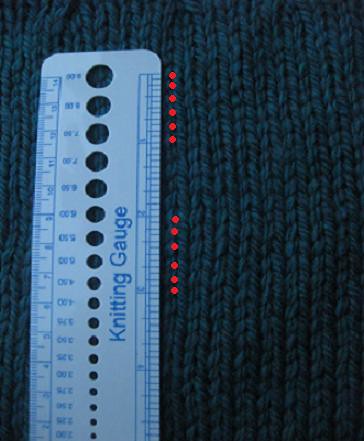
So, we now know, using two different methods no less, how to work out how much to decrease if you end up working to a different tension. Probably worth pointing out that you can also use those methods to work out how to increase i.e. back up to a full bust width or on the arms. What we didn't get round to doing was working out where to place them in terms of rows. Funnily enough, this is very similar to the stitch workings out we did. Let's have a look:
So, this is the point when indie and commercial patterns part company. Ever tried a
Ysolda Teague pattern? You'll find that she, and indie designers like her, give you a map of how the pattern should fit.
This arm map comes from the delightful
Arisaig pattern available for free on Knitty.com. Here, you've got all the information you need to know how long you've got to increase on your sleeve. For the smallest size, she gives you 17.75 inches in which to increase. Using her gauge from this pattern (11 rows per inch) we can work out that we have roughly 195 rows in which to increase. (17.75 multiplied by 11).
You can see at the bottom that there's a short space with no shaping which is nice because it means you can get some lovely even numbers to work with.
We'll stick with the example we worked out last time, so as not to cause too much confusion but armhole shaping is often more severe than this (in that it happens much quicker) so bear with it. We need to increase 2 stitches, 10 times, we can knit a certain amount straight until we reach a point where we're increasing. Let's do some maths.
So, when we think about it, what we're really trying to work out is nine nicely spaced sections, we'll:
Increase,
Knit a bit,
Increase,
Knit a bit,
Increase,
Etc. etc, until our last
Increase.
We'll have increased ten times altogether and there should be nine 'knit a bits' in between them. Make sense?
So, what we need, if we're increasing ten times, is a number that is nicely divisible by nine. What I mean by nicely divisible is an even number really. It's always nice to increase on a right side row, mainly because this is often knitted (as opposed to purl) but also because that's mostly what we're used to doing in standard knitting patterns, no need to fix what isn't broke (although, if you can't find a number that's 'nicely divisible' don't feel discouraged, increasing on a wrong side row isn't hard or wrong). Anyway, it's nice to increase on a right side row, and an even number means that you're 'knit a bits' will be odd numbers which is quite usual.
Back to the example:
We have to increase 10 times over 195 rows so we need to find a nice number that our nine sections can be.
195 / 9 = 21.67. No good, as knitters we can't deal with decimal points and 21 is an odd number to keep in your head. Let's try again.
180 / 9 = 20. Ahhh, that feels a bit better, no? Increasing every 20th row would be easy to remember and it's 'nicely divisible'. What it does mean is that we'd knit 14 rows before we increase (the difference between 195 and 180 minus the purl back row we'd have to do after our last increase to get us into a position to start casting off for the armhole shaping. .
That's fairly easy isn't it?
Now, working with a commercial pattern is very different. You don't get a lovely picture, the best you get is a table telling you how long the arms will be (to be fair, if you have that, that's great because it's more or less the information that Ysolda gives us).
If they don't give you measurements or pictures, we'll have to do the working out ourselves. I'm going to use a bog standard King Cole jumper pattern for our example this time and work again, on the arm (though King Cole, to their credit
always give you the measurements you need to not have to do this...).
So, cast on 43 stitches and work in rib for
6 rows, swap to stocking stitch work
20 rows plain and increase into the
next row every following
fifth row until there are 81 stitches.
The bold stuff is the info we'll need to work this out.
So, first and foremost, the information staring you in the face is that you need to work
6 and
20 rows fairly plain so you've got an initial count of
26 rows to work. Then we need to work out how many rows will be knitted in the process of increasing.
We know that we need to get from 43 to 81. So, 81 - 43 = 38, and they're paired increases so we'll increase 19 times.
They've told us to increase on the next row, so add that row to the count (26 + 1 =
27) and take that increase off the total increases (19 - 1 =
18). So we're now doing, 18 sets of 5 rows (18 multiplied by 5 =
90) so that's 90 rows over the period of increasing. so 90 plus 27 =
117. So, you've got 117 rows worth of space to do you increasing.
Their row gauge is 7.5 rows per inch. We divide 117 by 7.5 to work out how many inches this correlates to and the answer is 15.6 (blimey! I've checked the measurement table, and it bloody works!!!!).
So, we've got 15.6 inches to increase however many times you've worked out you need to, and then it's back to the Ysolda example because from hereonin we've already been through.
Clear as mud?
I think one day I'll come back and put this all into one post, perhaps with a few equations to simplify it but hopefully you've got an idea that actually, it's just plain maths, broken up dead simply and worked through slowly. Anybody can do this!
Now, I'm off to have a lie down...
See you soon!! :)


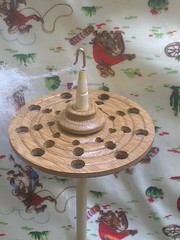
 Once I had finished spinning on my spindle ( usually more than shown on the photo) I slide the cops off and instead on winding into two two balls to ply I placed them to soak in cold water.


