
So, blocking is kind of like pressing but better, less time consuming and you don't need to go anywhere near an ironing board - win! Come with me and we'll discover together the curious art of blocking...
Here's a photo of the item fresh of the needles (actually, it's just a photo of part of the item. I tried to get the whole thing in but it looked pretty pathetic and this is a perfect example of what blocking can do to messed up....drunken... kitchener stitch). At this point, I'd sewn in the ends but not cut them down to size - I'll do that after the blocking is done.

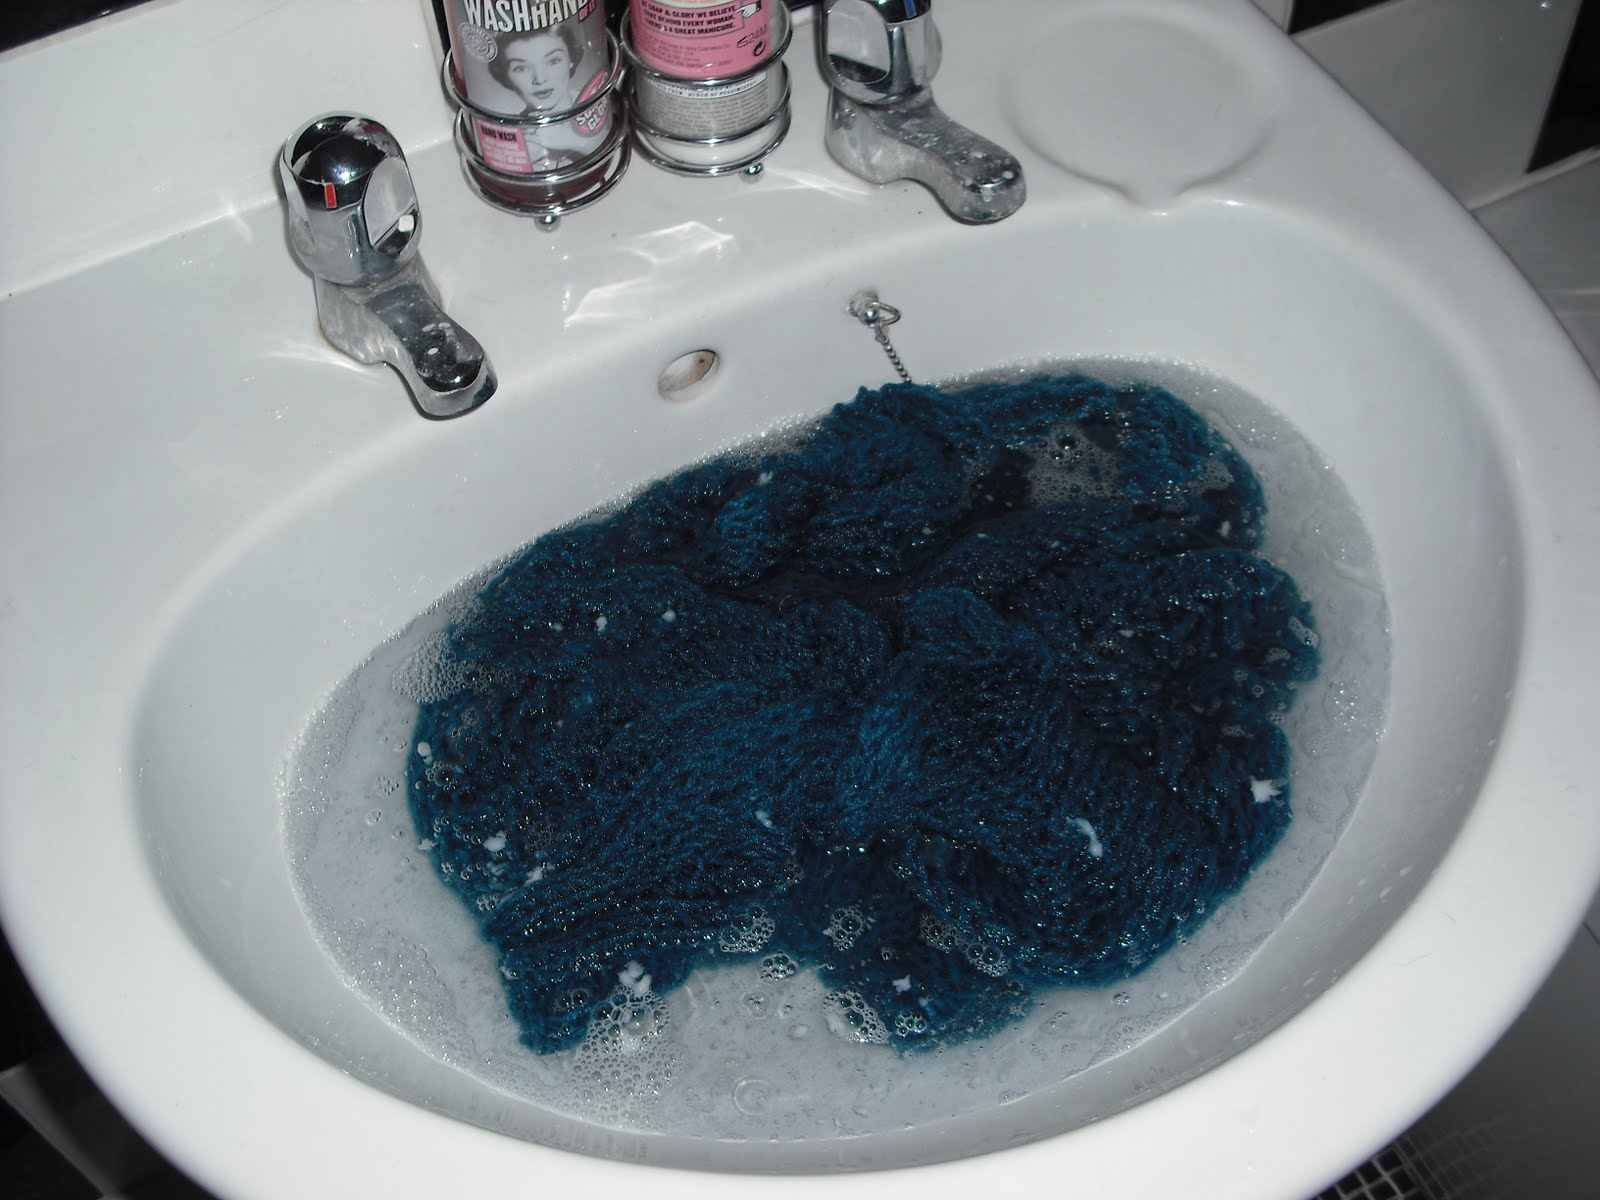
The garment gets carefully placed into a sink full of warm water (I like bath temperature, some people prefer luke warm. The answer is, as always, use whatever you prefer...) with a smidge of hair conditioner. There are specialist wool cleaning products out there, but my bank balance and I prefer whatever is on sale at Boots (or any other high street cosmetic store). Make sure, especially if the item is non-superwash wool, that you don't agitate the item or you'll end up with a hot felted mess...
Leave it for a good 20 to 30 minutes to allow the fibres so fully absorb the water. Gently squidge the item into a ball so that you're not allowing the yarn to stretch under its own weight when it's out of the water and empty the sink.

Refill with roughly the same temperature water, gently replace the item and leave for 10 minutes or so. If you're using conditioner and wool, this step is particularly important because sheep's hair is a lot like ours and will end up dull, lifeless and fragile if you allow a build up of product.
Carefully remove the item (squidge it into a ball etc) and place at one end of a dry towel , thus:

Roll the towel, stand on it and walk up and down to remove most of the moisture (feel a bit sad that you haven't got slippers as funky as mine...).

Unfurl the wet towel and move the item onto a new one which has been spread out on a flat surface, keep the knitting squidged in its ball for safety. Use your hands to smooth the item into position.

Most indie patterns nowadays come with a schematic which is, roughly speaking, a diagram showing you the various measurements for your item. Other pattern producers might give you a written (and usually less detailed) version of this - but it's still useful. Use the schematic to measure certain points on your garment - for example, I need this cardiagan to be 26 inches long, let me measure and smooth it out so it is thus long:

The final step is to leave the item to dry - harder than it sounds when you want to keep admiring your work - just make sure you don't touch it! A fan will speed up the drying process.
Join us tomorrow for the results of today and a different, and more complex, method of blocking.
Love Eleanor, toodle pip.
I love blocking! It makes a piece look so finished! I have a little, er, problem with keeping my edges even, so when I block my pieces I pin them (with many, many T-pins) to a towel on the bed and leave them to dry. It evens the edges right up. :)
ReplyDeleteAhh - good tip K.C! Comparing your edges to any straight surface will do and a towel adds an extra layer of absorbency.
ReplyDelete